
You can never be too careful when it comes to keeping your data safe. The dangers can come from the places or people you would least expect it. A family member may use your computer for just a minute to upload something, but what if the USB drive has a virus he/she’s not aware of?
Disabling your computer’s USB drives can help keep your files safe, and the process is easier than you think. There are multiple methods you can choose from, and if one doesn’t work for you, you can always try another.
How to Disable/Enable a USB Drive Using the Registry
If you want to try to disable a USB drive using the registry, type “run” in the search box. When it appears, type
regedit and the registry editor should appear. Look for and double-click on the “HKEY_LOCAL_MACHINE” option.
A few options down you should see the “SYSTEM” option. Click on that option, followed by the “CurrentControlSet” option.

The next folder you’ll need to select is the “Services folder -> USBTOR.” To find the USBTOR option, you’ll need to pass quite a few folders since they are all in alphabetical order. Click on the Start option that should be towards the bottom, and a new window will emerge.
The value data, by default, will be set to “3.” To disable USB storage, you need to change it to “4.” Click OK. To (re)enable the USB storage, just change the value data back to “3,” and the USB storage will be enabled again.
Use the Device Manager to Disable USB Ports
Disabling the USB ports through the Device Manager is also pretty straightforward. Right-click on the Start menu, and click on “Device Manager.” When the window appears, click on Universal Serial Bus controller. (It’s the last option on the list.) You can also choose the uninstall option for the USB drive, and when someone inserts a USB, Windows won’t be able to find the drivers.

Disable USB Storage by Using the Group Policy Editor
To disable the USB storage by using the Group Policy Editor, you’ll open “Run.” Once it’s open, type
gpedit.msc. On the left pane click on “Computer Configuration -> Administrative Templates -> System -> Removable Storage Access.”
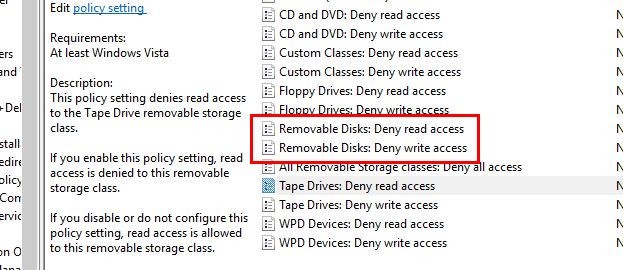
When you click on “Removable Storage Access,” new options will appear in the right pane. Look for and click on the options that say “Removable Disks: Deny execute access,” “Removable Disks: Deny read access,” and “Removable Disks: Deny write access.”
Click on each one of them to configure them. After clicking on one, a window with the name of the option should appear. To the left there will be three options: Not Configured, Enabled, and Disabled.
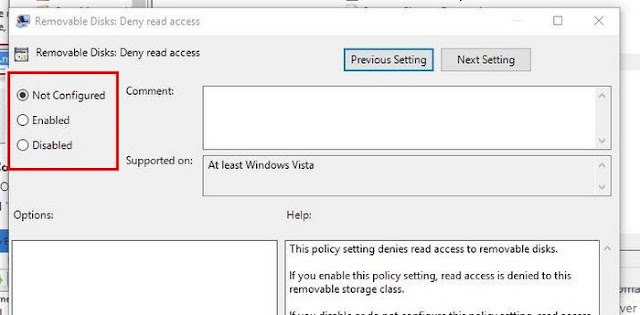
Click on “Enabled” to disable it. If you ever change your mind and what to enable them again, choose the “Not Configured” or “Disabled” option.
Conclusion
The reasons why you may want to disable the USB storage can vary. The important thing is that you’re able to keep your data safe, even if that means having to disable USB connections. Which method do you think you’re going to try first? Share your thoughts in the comments below.
Post a Comment
THANKS for comment!!!!